Showing posts with label Decorate. Show all posts

Thursday, January 24, 2013

Thursday, January 17, 2013

I might have a slight obsession...

... with owls. 
In fact, I know I have an obsession with owls. 
Not the scary, brown ones with the piercing eyes.
The pretty mercury glass ones.
The white ceramic ones.
The kind that hold salt and pepper.

You wouldn't notice my addiction when you first step into my house. They are tucked on bookcases, used as a door stop, on a shelf in the bathroom, perched on a dresser...

Blake and I took a count this week. 
It was slightly embarrassing considering I brought home a new owl Tuesday night. 
12 owls.
If you include the salt and pepper shakers to be one item. 

Here is my collection: 

I was looking online for a fun addition to the collection and came across these options. It looks like I am not the only one loving owls at the moment!
1 / 2 / 3 / 4 / 5 / 6 / 7 / 8 / 9 / 10 / 11 / 12 / 13

Do you have an item you can't seem to get enough of?

Sunday, July 22, 2012

The Last Room

My mom and I had a few days to ourselves(4 to be exact) several weeks ago. Blake took the kiddos to visit his family and I'm not allowed to travel so Mom and I brainstormed a "To Do" list. At the top of the list was the kids bathroom. It was the last room in the entire house still left to repaint! I don't have any before pictured but it involved a brown paint and towel bar. It was dark and just felt dirty. 

Here is what the family came home to. 
All credit goes to Mom. 
I simply purchased the supplies and sat across the hall in the nursery and chatted while she worked. :) 


Wall Color: Bay Waves(Satin) by Valspar
Trim: Ultra White(Semi-Gloss) by Valspar
Hooks: Hobby Lobby and Anthropologie
Knobs: Hobby Lobby

Wednesday, February 8, 2012

A Work In Progress - The Basement

Keep in mind that I still have a list a mile long of things I'd like to do to finish up this space. We need a few new pieces of furniture. There are a few blank walls. More toys fill the room then I would prefer, but man do those toys keep my children entertained. :) Just thought we would share where the removal of the wall left us...  

This cubbie has been updated slowly, but is finally complete. A perfect place to drop their shoes and bags when coming in from the car.

The original paneling and chipped walls left it looking dingy and dirty - Painting the basement lightened it up!

Ottomans with storage were a must! Our 3 kids are obsessed with blankets and these offered a clever hiding spot!

Yes. Yes, that is Law and Order SVU. And yes I have watched every single episode. And still watch reruns religiously. Please don't look too closely at the bookshelf. It needs some major staging!

Now the half wall has been removed the basement seems so much lighter and airier. There was great light in the back, but was blocked/cut off. The room feels pretty bright for a basement. 

You can see a slight variation in the carpet. Honestly, it is hardly noticable unless you are studying the floor. Mom and I went to a carpet store and bought a 2x3 size sample for $1 that mom pieced into the space. Of course, new carpet is on our to-do list, but I don't mind waiting for a few years until the kiddos are beyond the "drawing on the carpet and walls with a sharpie marker" phase.


Our kiddos LOVE these chairs. They help to keep the peace when watching movies or having quiet, reading time. Man, are they bulky! It was helpful to get to spread them out a bit.


Like I said - There is still ALOT to be done in the next few years to get this space exactly where I want it, but it is most definitely on its way!

*The toys that clutter the room? Well, they are a precious reminder of the blessings the Lord has given me. I know that one day I will miss those toys... So I'll be grateful for them today!


Room Specks
Wall Mirrors: All 4 are from Home Goods
Ottomans: Target
Stuffed Children's Chairs: Pottery Barn Kids - Anywhere Chairs
Children's Table: Ikea Kritter Table

Friday, January 27, 2012

Now You See It - Now You Don't

We have a little half wall in our basement. We did not like. We did not need it.
An old photo where you can barely see how the wall divided the back half of our "L" shaped basement.


So we asked Blake's handy grandpa to help us remove it and Blake's Dad came along.
In 3 hours flat the wall was out!


I can't tell you how thankful I am that Blake's father and grandfather made a day trip for our little wall! We most definitely done it without them. Ok. We couldn't have done it at all. :)
They did all the work and we just watched.
Thanks Papa and Grandad Riley!

There is still alot left to do to finish up the basement, but I am thrilled to have the space! It totally opens up the area and provides alot more space for play! I can't wait to share the "after" pictures... Things are coming along.

Tuesday, September 20, 2011

A Light Stripe

This is not a well organized post. I attempted to find some "before" photos, and searched and searched and searched... None. I know that I have some somewhere, but I have filed them away. Yesterday, my mom came over and fulfilled my dream for a stripe in my little boy's nautical room. I was finding the Eddie Bauer Wicker dark. The only window is off center and the room felt dreary. Between the bright blue accents and the white stripe(that appears off-white in these photos), I think I am on track for a lighter look! I think that after a few more accents and headboards we will be about done!

These pictures are terribly grainy and out of focus... So sorry!
 Hoping to start a photo series with some great photos in the near future.


Thursday, August 11, 2011

Layers

I feel like every room in our house is a work in progress...
This is our family room about 6 months ago. I think of this as our first layer.


This is our family room today. Not alot has changed, but a few accessories have warmed the place up. A rug(better, but not perfect), side table, lamp, and a few wall hangings later and the room feels warm and used! I love the result of SLOWLY layering... It is adding those books and pictures and knick-knack souveniers that make a room "you". I searched for months for the perfect side table and I have had  my eye on that lamp for months just waiting for the perfect place to put it... Sometimes I rush to finish a space, but am learning that if I slow down and build a room layer by layer as opposed to throwing everything in at one time, I am much happier with the result. This is a room I feel "at home" in.


Tuesday, July 26, 2011

a little can of spray paint

So technically this took 2 cans: a can of primer and a can of glossy white.
The owl and the tray came from the dollar section of Target!
The candelabra's were my great aunts and are so heavy! Solid Brass.


I need to take a few shots of them in their new homes... The candelabra filled out a space above my bed and the owl and tray are still being moved around. :)

Monday, July 4, 2011

The Powder Room - Finished

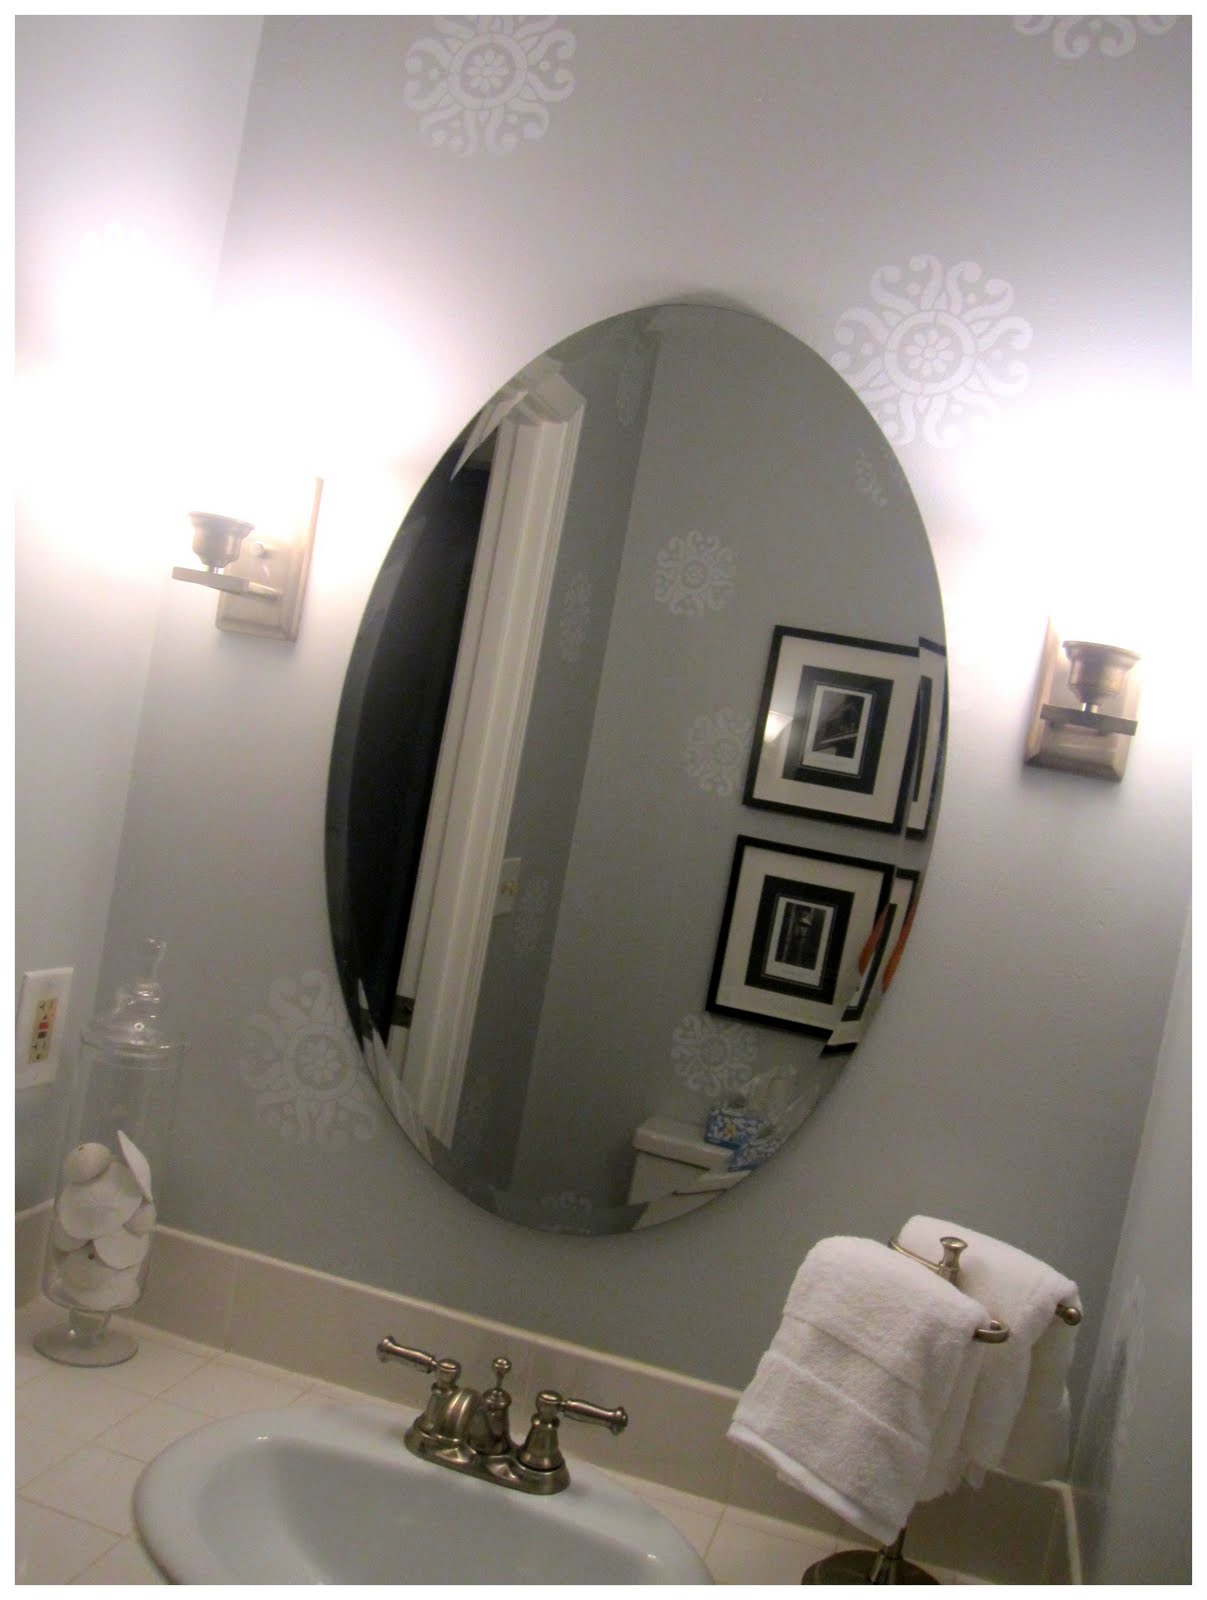
Our first floor powder room has been a work in progress. It was one of my least favorite rooms when we moved into our homse and is now, perhaps, my favorite! If you need a reminder of the process you can read this post about how I painted the cabinet, or this post about choosing the mirror, or this post about painting the walls the perfect blue.

After months of searching for just the right accessories and wall hangings, I was stumped. Couldn't find just the right thing. So after seeing stenciling on several popular blogs mom and I decided to give it a go.

 We painted our first stencil right behind where the mirror hangs. :)
 We chose to use a random pattern.
 WThe stencil needs to be cleaned between every application. Make sure to wipe all the excess off of the back so not to transfer the bleed through.
We were able to roll out 3 stencils off of 1 wet roller. You have to be careful to not make the foam too wet or you will bleed through the stencil. All. Over. The. Place. :)


I love the results!

Where Did The Stencil Come From? Royal Design Studio
*Got 10% off using coupon code YHL10 from Young House Love*
How Much Did It Cost? It cost about $20 for the stencil and about $20 for the other supplies.
What Supplies Were Necessary? The stencil, foam rollers, qt of paint(your choice-I used Valspar White Satin), Paint tape
Related Posts Plugin for WordPress, Blogger...